Setup Gloo Mesh and Components
At the end of this chapter you would have
-
Installed Gloo Mesh Enterprise
-
Registered Clusters
-
Installed Istio on to mesh clusters
-
Created Virtual Mesh
Pre-requsites
-
You have setup three Kubernetes clusters one for each Management and two meshes
-
You Gloo Mesh Enterprise license key
Environment variables
For a easier and smoother setup, lets define few environment variables that we will refer in the upcoming sections and chapters.
export GLOO_MESH_LICENSE_KEY=<your gloo mesh enterprise license key>(1)
export MGMT=<your management server name>(2)
export CLUSTER1=<your mesh with istio cluster 1>(3)
export CLUSTER2=<your mesh with istio cluster 2>(4)| 1 | The Gloo Mesh License Key |
| 2 | The Kubenretes cluster which will be used Gloo Management Cluster |
| 3 | The Kubenretes cluster which will be used Gloo Mesh Cluster i.e. where workload will be deployed |
| 4 | The Kubenretes cluster which will be used Gloo Mesh Cluster i.e. where workload will be deployed |
|
The cluster mapping are done based on Cloud Components. Adjust as per your cluster setup. |
Install Gloo Mesh
meshctl install enterprise \
  --include-rbac \
  --license $GLOO_MESH_LICENSE_KEY \
  --kubecontext $MGMT
  --version v1.1.0-beta29
Wait for enterprise networking to be ready
kubectl --context "${MGMT}" \
  -n gloo-mesh rollout status deploy/enterprise-networking
"Hello World"Cluster Registrations
export MGMT_INGRESS_ADDRESS=$(kubectl --context=$MGMT get svc -n gloo-mesh enterprise-networking -o jsonpath='{.status.loadBalancer.ingress[0].ip}')export MGMT_INGRESS_PORT=$(kubectl --context=$MGMT -n gloo-mesh get service enterprise-networking -o jsonpath='{.spec.ports[?(@.name=="grpc")].port}')export RELAY_ADDRESS="${MGMT_INGRESS_ADDRESS}:${MGMT_INGRESS_PORT}"Cluster 1
Set a name for the cluster that is to be registered:
export CLUSTER_NAME='cluster-1'Register it,
meshctl cluster register enterprise --mgmt-context="$MGMT" \
  --remote-context="$CLUSTER1" \
  --relay-server-address "$RELAY_ADDRESS" \
  "$CLUSTER_NAME" \
  --cluster-domain cluster.local
"Hello World"Cluster 2
Set a name for the cluster that is to be registered:
export CLUSTER_NAME='cluster-2'meshctl cluster register enterprise --mgmt-context="$MGMT" \
--remote-context="$CLUSTER2" \
--relay-server-address "$RELAY_ADDRESS" \
"$CLUSTER_NAME" \
--cluster-domain cluster.local"Hello World"Check the status of the agents
meshctl check serverGloo Mesh Management Cluster Installation
--------------------------------------------
🟢 Gloo Mesh Pods Status
+-----------+------------+-------------------------------+-----------------+
| CLUSTER | REGISTERED | DASHBOARDS AND AGENTS PULLING | AGENTS PUSHING |
+-----------+------------+-------------------------------+-----------------+
| cluster-1 | true | 2 | 1 |
+-----------+------------+-------------------------------+-----------------+
| cluster-2 | true | 2 | 1 |
+-----------+------------+-------------------------------+-----------------+
🟢 Gloo Mesh Agents Connectivity
Management Configuration
---------------------------
2021-08-12T10:22:53.791937Z info klog apiextensions.k8s.io/v1beta1 CustomResourceDefinition is deprecated in v1.16+, unavailable in v1.22+; use apiextensions.k8s.io/v1 CustomResourceDefinition
🟢 Gloo Mesh CRD Versions
🟢 Gloo Mesh Networking Configuration ResourcesInstall Istio
Install Istio on to the cluster cluster-1:
istioctl --context $CLUSTER1 operator init
CLUSTER_NAME='cluster-1' envsubst < $DEMO_HOME/config/istio-cr.yaml | istioctl manifest install -y --context $CLUSTER1 -f -
Check and verify the install:
istioctl verify-install --context=$CLUSTER1Install Istio on to the cluster cluster-2:
istioctl --context $CLUSTER2 operator init
CLUSTER_NAME='cluster-2' envsubst < $DEMO_HOME/config/istio-cr.yaml | istioctl manifest install -y --context $CLUSTER2 -f -
Check and verify the install:
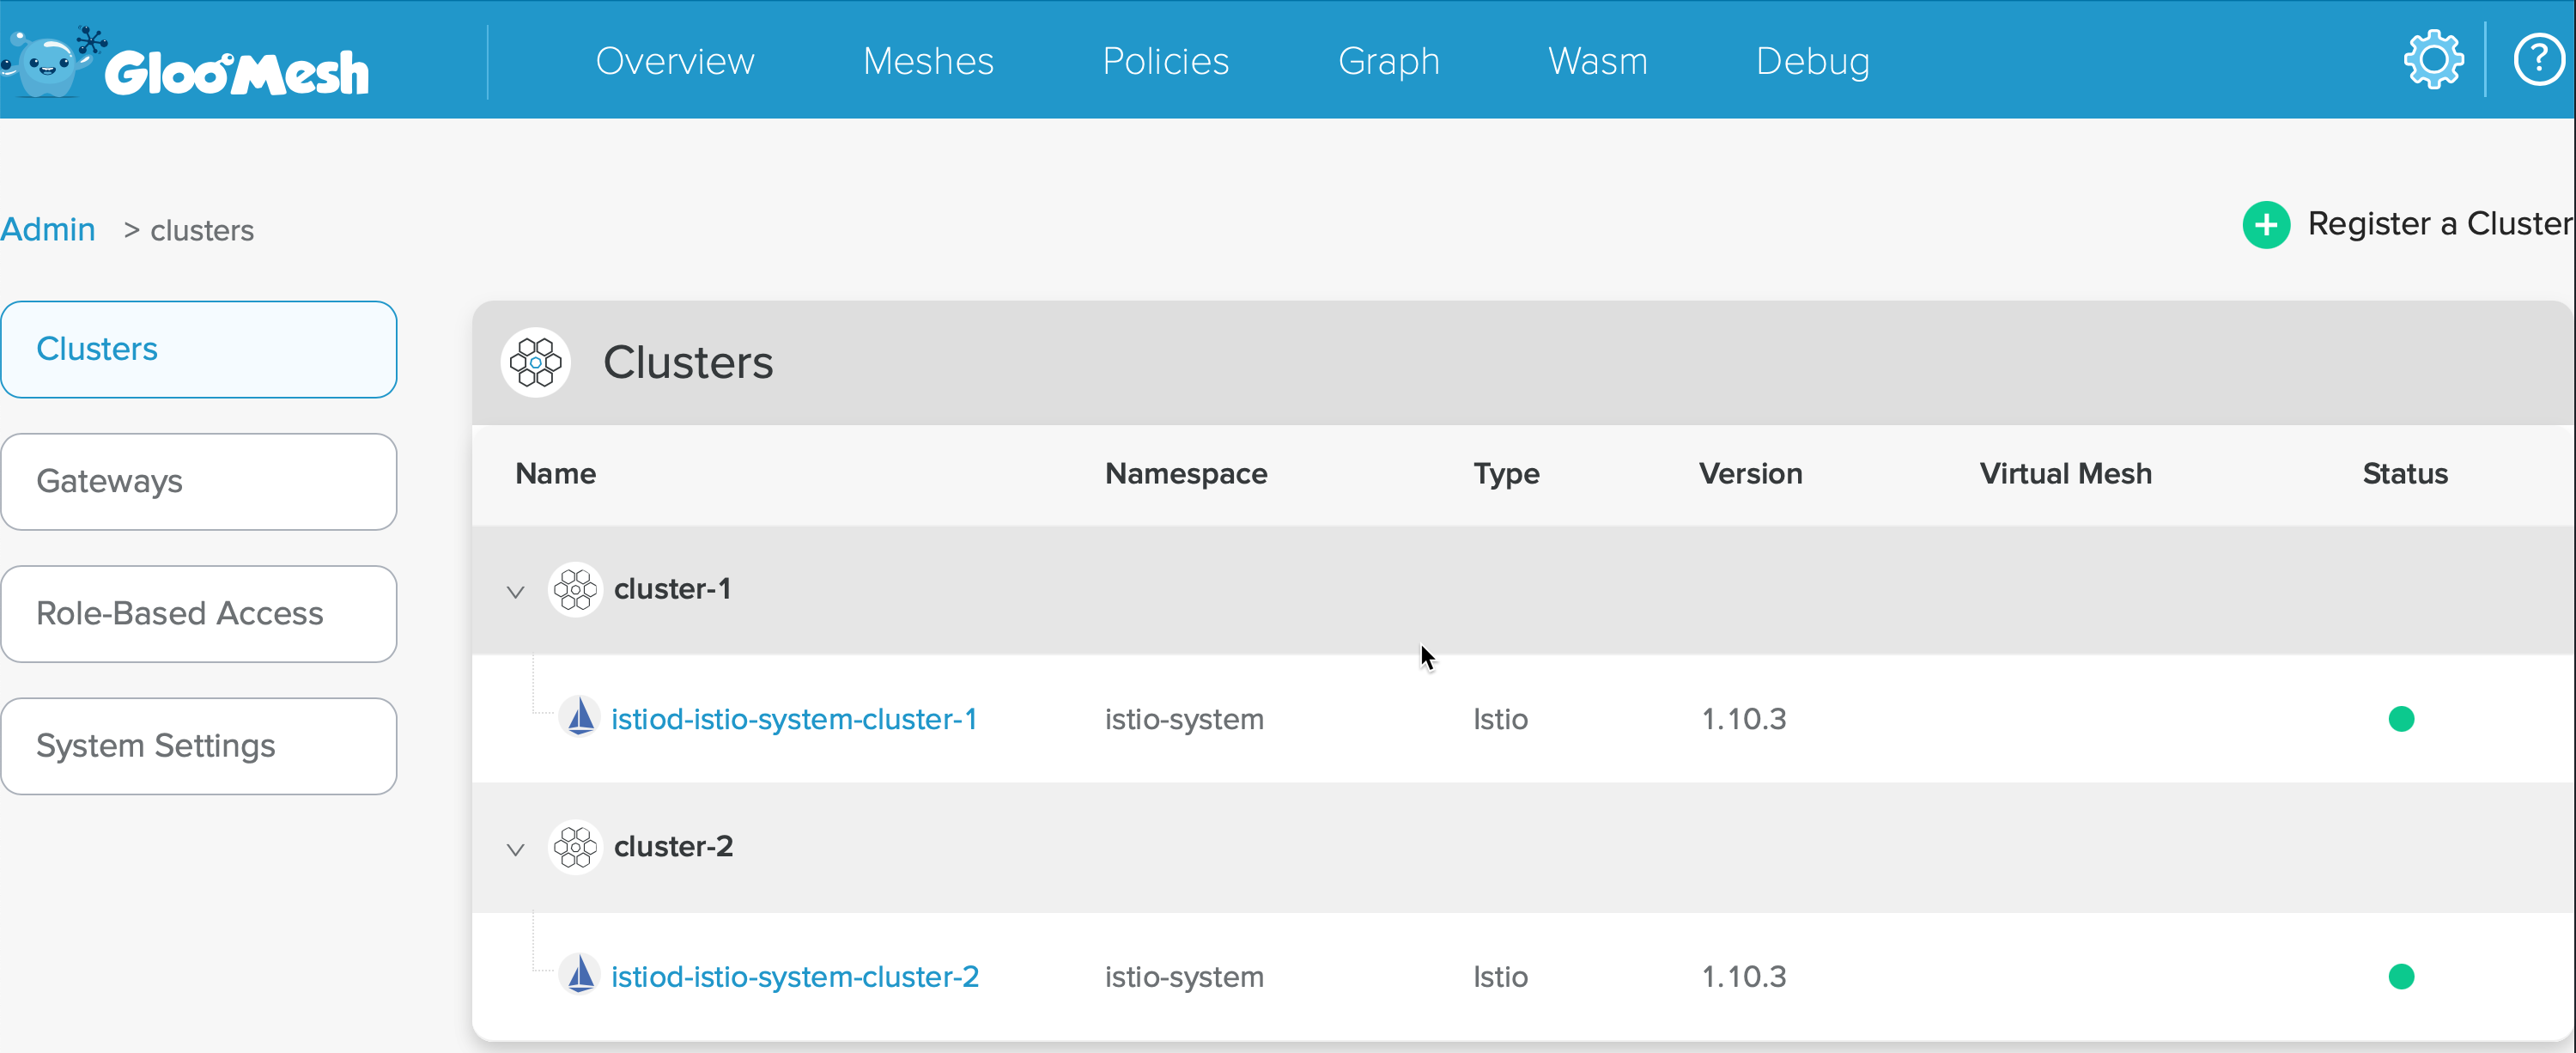
istioctl verify-install --context=$CLUSTER2After setup steps, the mesh dashboard should look like,
Update admin-role
Patch the admin-role to allow all users of system:masters Group (Kube Admins)
kubectl --context ${MGMT} -n gloo-mesh patch rolebindings.rbac.enterprise.mesh.gloo.solo.io admin-role-binding --type=merge --patch "$(cat $DEMO_HOME/config/rolebinding-patch.yaml)"Enable mTLS between clusters
On each mesh cluster where you have installed istio run the following manifest to enable mTLS,
kubectl --context=$CLUSTER1 apply -f $DEMO_HOME/config/peer-auth.yaml
kubectl --context==$CLUSTER2 apply -f $DEMO_HOME/config/peer-auth.yaml
Create Virtual Mesh
export MESHES=$(kubectl --context=$MGMT get meshes -n gloo-mesh -o yaml | yq eval '.items[].metadata|[{"name": .name,"namespace": .namespace}]' -)
yq eval -P  '.spec.meshes = env(MESHES)' $DEMO_HOME/config/virtual-mesh-template.yaml > $DEMO_HOME/config/virtual-mesh.yaml
kubectl --context=$MGMT apply -f $DEMO_HOME/config/virtual-mesh.yaml